Integrating Content Island into the Claude Code workflow
Intro
Claude Code has become one of the most powerful AI tools for code generation.
You can follow the step-by-step guide in this video to learn how to integrate Claude Code + Headless CMS.
Real estate portal
As an example, imagine we want to build a simple portal for a local real estate agency. We will implement:
- A navigation bar with links to different sections of the portal.
- A Hero section where we add the agency name and main actions.
- A featured properties section, where the most relevant properties are displayed.
- And when clicking on a featured property, a page showing property details, including images, description, price, and a contact form.
This is modeled in Content Island.
If we go to the Model tab, we can see all the entities that make up the project:
- In
Property, we can see all the fields for a property for sale or rent. - We have modeled the
Herosection:- Call to actions
- Background image
Regarding data, we can go to the Content tab, switch to tree view (Tree), and under Property see:
- Title
- URL slug
- Internal reference
- Description
- Long description
- City area
- Property type
- Size (square meters)
Project setup
Before starting with Claude, we begin from a blank template.
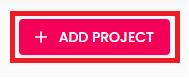
We can use the Content Island template from Add Project.
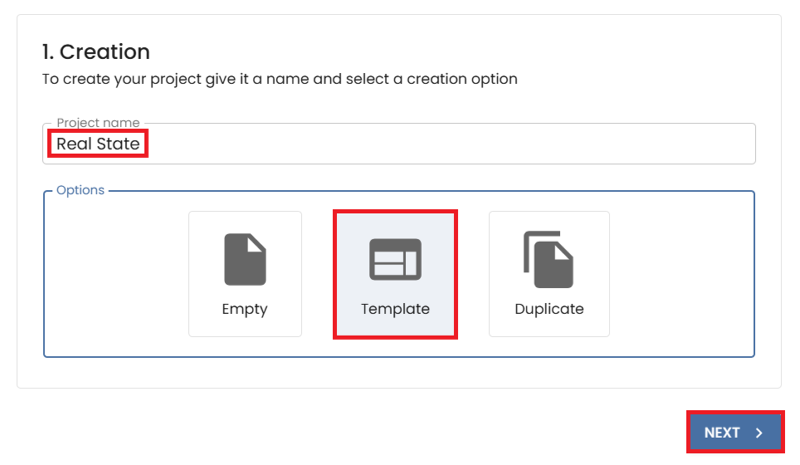
Name the project (Real Estate), choose a template, and click Next.
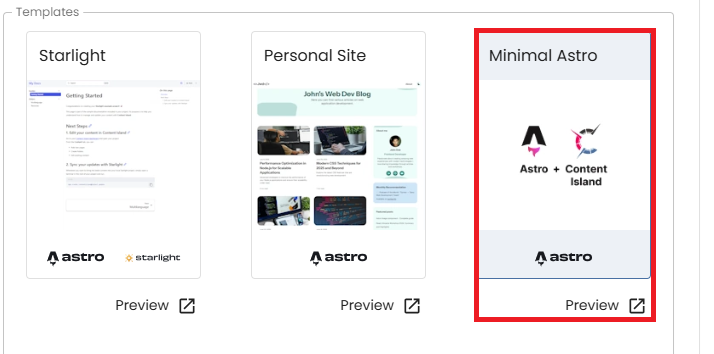
Select the Minimal Astro template.
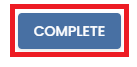
Click Complete.
In the Quick start section, copy the CLI command.
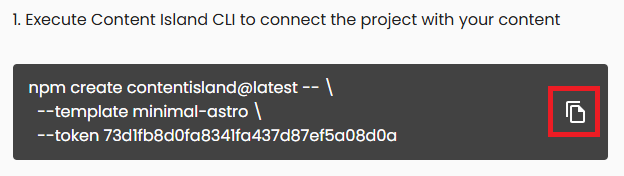
Open Visual Studio Code in an empty folder, paste and run the command.

The CLI will ask several questions:
- Where to create the project
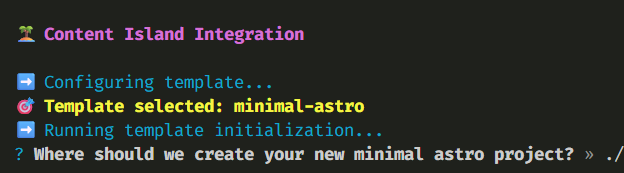
- Whether to install dependencies (
npm install)

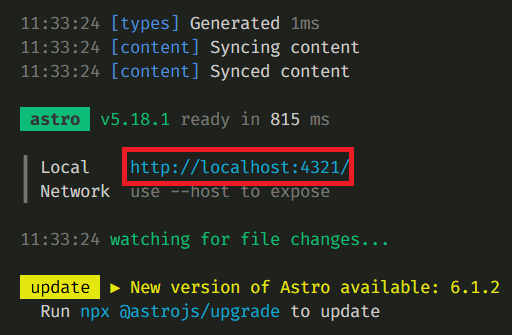
Then run npm run dev and copy the url
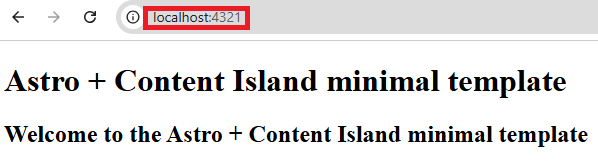
Paste the URL and open it in a browser.
Remove the example code
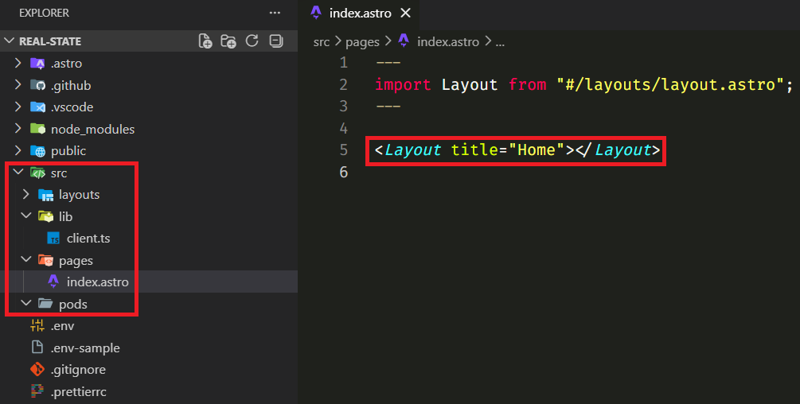
and replace the token with your real estate project token:
71e67ac275e9c9645715f2f67979003f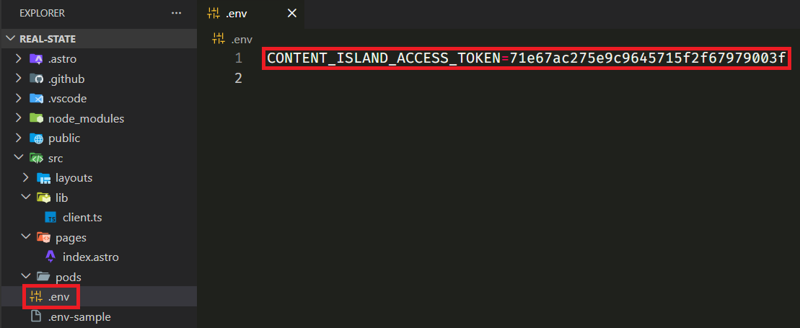
Configuring the project for Claude Code
Content Island exposes an MCP that allows Claude Code to access the project's data.
MCPs
Content Island exposes an MCP that allows Claude Code to access project data.
Run:
claude mcp add content-island \
  --transport stdio \
  --scope project \
  -e CONTENT_ISLAND_ACCESS_TOKEN=YOUR_PROJECT_CONTENT_ISLAND_ACCESS_TOKEN \
-- npx -y @content-island/mcpNote: replace YOUR_PROJECT_CONTENT_ISLAND_ACCESS_TOKEN with the value of the Content Island access token. You can find this value either in the environment variable we created a few steps earlier or by copying the Token value from the General section of Content Island.

You can find it configured in:
.mcp.json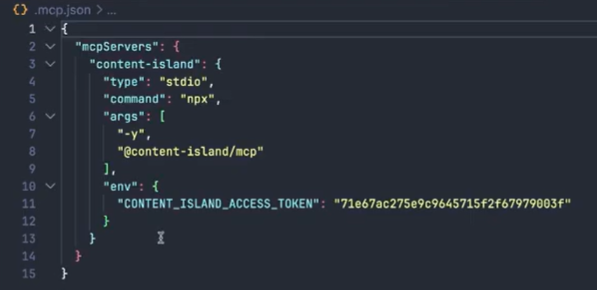
To confirm everything is set up properly, run:
claude mcp get content-island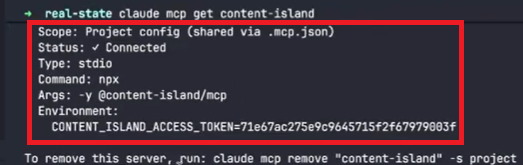
Skills
Skills provide specialized instructions to Claude.
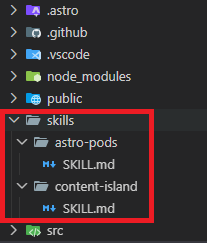
Create:
Create files, and we paste the corresponding content
skills/content-island/SKILL.md
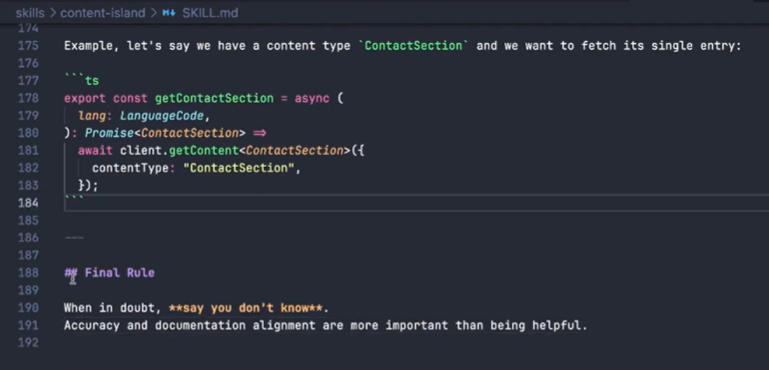
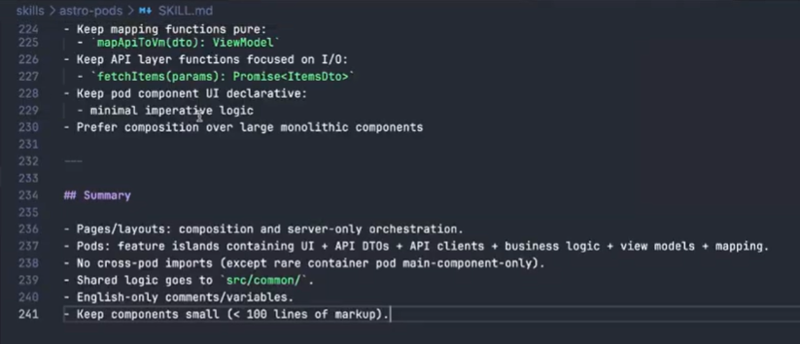
skills/astro-pods/SKILL.md
The folder structure would look something like this:
Finally, we’re going to add a skill so that Claude improves its frontend design capabilities. We’ll install this from Claude’s skills marketplace—specifically the "Frontend Design" skill by Anthropic.
How do you install it?
First, we need to add the Anthropic skills repository from the marketplace:
/plugin marketplace add anthropics/skills
Then, we install the frontend-design skill from Anthropic (make sure to select “Install for all collaborators on this repository (project scope)”).
/plugin install frontend-design@anthropics/skills --scope project
Note: if you already have Claude Code running, it’s a good idea to restart the session so the new skill becomes available.
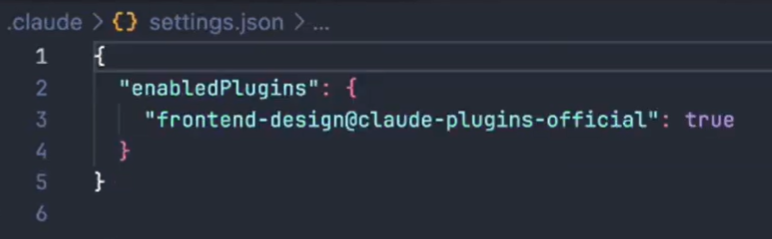
If we go to the .claude folder and open the settings.json file, we’ll see that the plugin is enabled.
Claude config
We’re also going to define a Claude.md configuration file. Here we specify a set of general instructions for Claude to follow when generating code—for example, telling it to use TypeScript or Tailwind for styling.
We’ll add the most important guidelines here; it’s not a good idea to write too much, as that would overload Claude’s context and consume too many tokens.
Create a file called Claude.md and paste the following content.
## General guidelines

- Use Tailwind CSS v4 and DaisyUI for all styling needs.
- Use semantic HTML5 elements and follow accessibility best practices.
- Design for mobile-first, ensuring a responsive experience across all devices.
- Use the astro-pods skill to structure the codebase and define responsibilities by layer.
- Use the content-island skill to fetch and render content, strictly following its security rules and allowed API surface.
- Use colors and theming like a professional designer, ensuring good contrast and a visually appealing palette, do not use IA like apporach.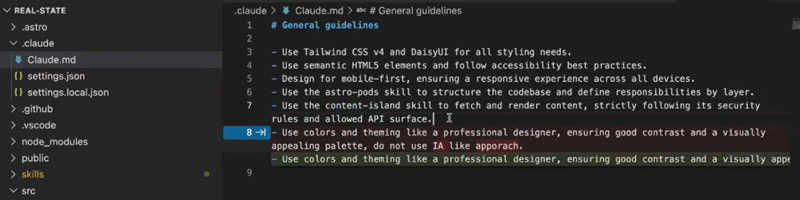
Development
For this demo, we follow a “Human in the loop” approach: we explain one step at a time, then review the result and define the next steps for Claude.
Initialize repo:
git init
Then prompt Claude:
The project you are working on is built with Astro and has access to the Content Island API, where you have modeled a neighborhood real estate agency, with information about the navigation menu, the hero section, and a list of properties, among other things.

Let’s start with the initial structure:

- You will create a layout with a header and a footer.
- In the header, you will create a top navigation bar with the links specified in the Content Island project, specifically the Header type. Here you have a series of links (use the includeRelatedContent flag to retrieve all related information for each link).
- Below the header, on the main page, you will add a Hero Section. The data will be read from the Content Island Hero type, which only has one entry. From there, you can retrieve everything, including the background image, and it also has main actions such as Buy and Rent, which you can display as buttons.

For the design, use your frontend design skills. To access Content Island data, use the skill you have defined for the Content Island Client API. And to structure the project, use the Content Island Astro Pods skill.
Before running it, press the keyboard shortcut Shift + Tab and switch to plan mode, since we want to see what it’s going to do.
Once the step is complete, we can review it and execute.
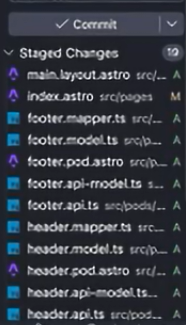
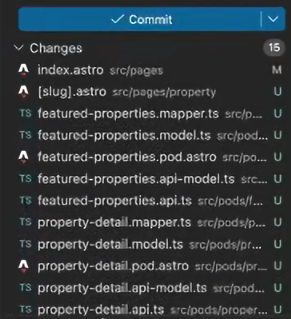
npm run devIt can generate a file structure similar to this.
Here we can see the header of the page we are creating.

And this would be the footer.

For the next step, we run the following prompt to generate the featured properties section:
Now, just below the Hero Section, I want to display a **featured properties** section.
To do this, you need to read the list of properties from the Content Island project and show only the ones that havve the **featured** flag enabled.
For each featured property, display:
- its main image
- its title
- its price
- wather it is for **sale** or **rent**
- a link to the property detail page
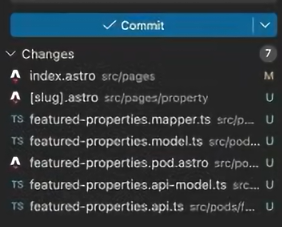
For the property detail page, you can leave a placeholder for noew with a text that says: **The property detail will go here**, and we will implement it later.It can generate a file structure similar to this.
Here we have the list of properties it generates:
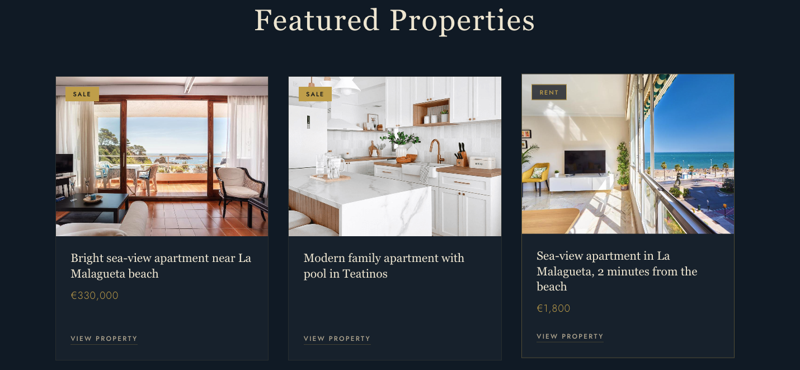
Not bad at all! If we click on one of the properties, it will navigate to the detail view, which for now only includes the property detail.
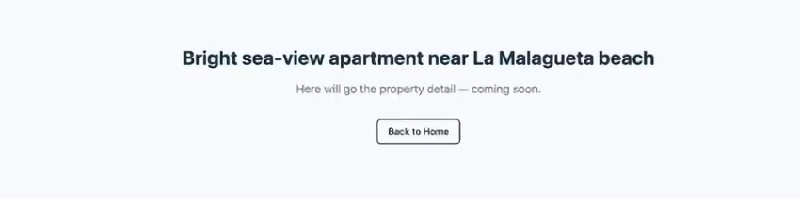
And finally:
Generate the property detail page, where it should display all the property information, including an imagen carousel, description, price, and a contact form.It can generate a file structure similar to this.
We go to the browser, click on one of the properties, and here we can see the property type, location, etc.

Conclusion
Integrating a Content Island project with Claude Code is simple and effective.